An Introduction to the ToneHub TracerUpdated 2 months ago
What is the ToneHub Tracer?
The ToneHub Tracer is an expansion for ToneHub subscribers that allows users to capture entire signal chains all on their own. This means you can capture the sonic characteristics of your amplifiers, stomp pedals (distortion, overdrive, fuzz, EQ, and boosts), and entire recording rigs that include speaker cabinets paired with your favorite preamps and microphones.
What is a Trace?
ToneHub uses AI Tracing Technology and Adaptive Tracing analog modeling as a powerful way to profile your favorite amplifiers (analog and digital), speaker cabinets, and stomp tones into the ToneHub digital platform environment. A Trace is the final saved preset that you're able to load up.
What equipment do I need?
We recommend an audio interface and a reamp box as a minimum for tracing hardware.
For direct Tracing and more complex rig tracing, please use a load box and consult your load box hardware/amp documentation for best practices.
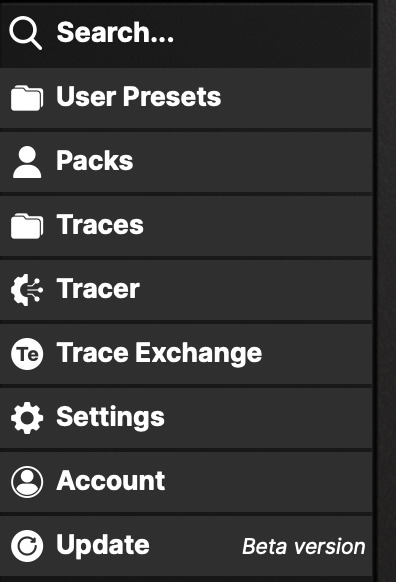
How do I access / activate the Tracer?
If you are a ToneHub Pro subscriber, you simply need to update to the latest version of the plugin. Since the update is free, the new Tracer and Trace Exchange sections will be unlocked in the main navigation menu.
Activation steps are available in our help center.
How do I make a Trace?
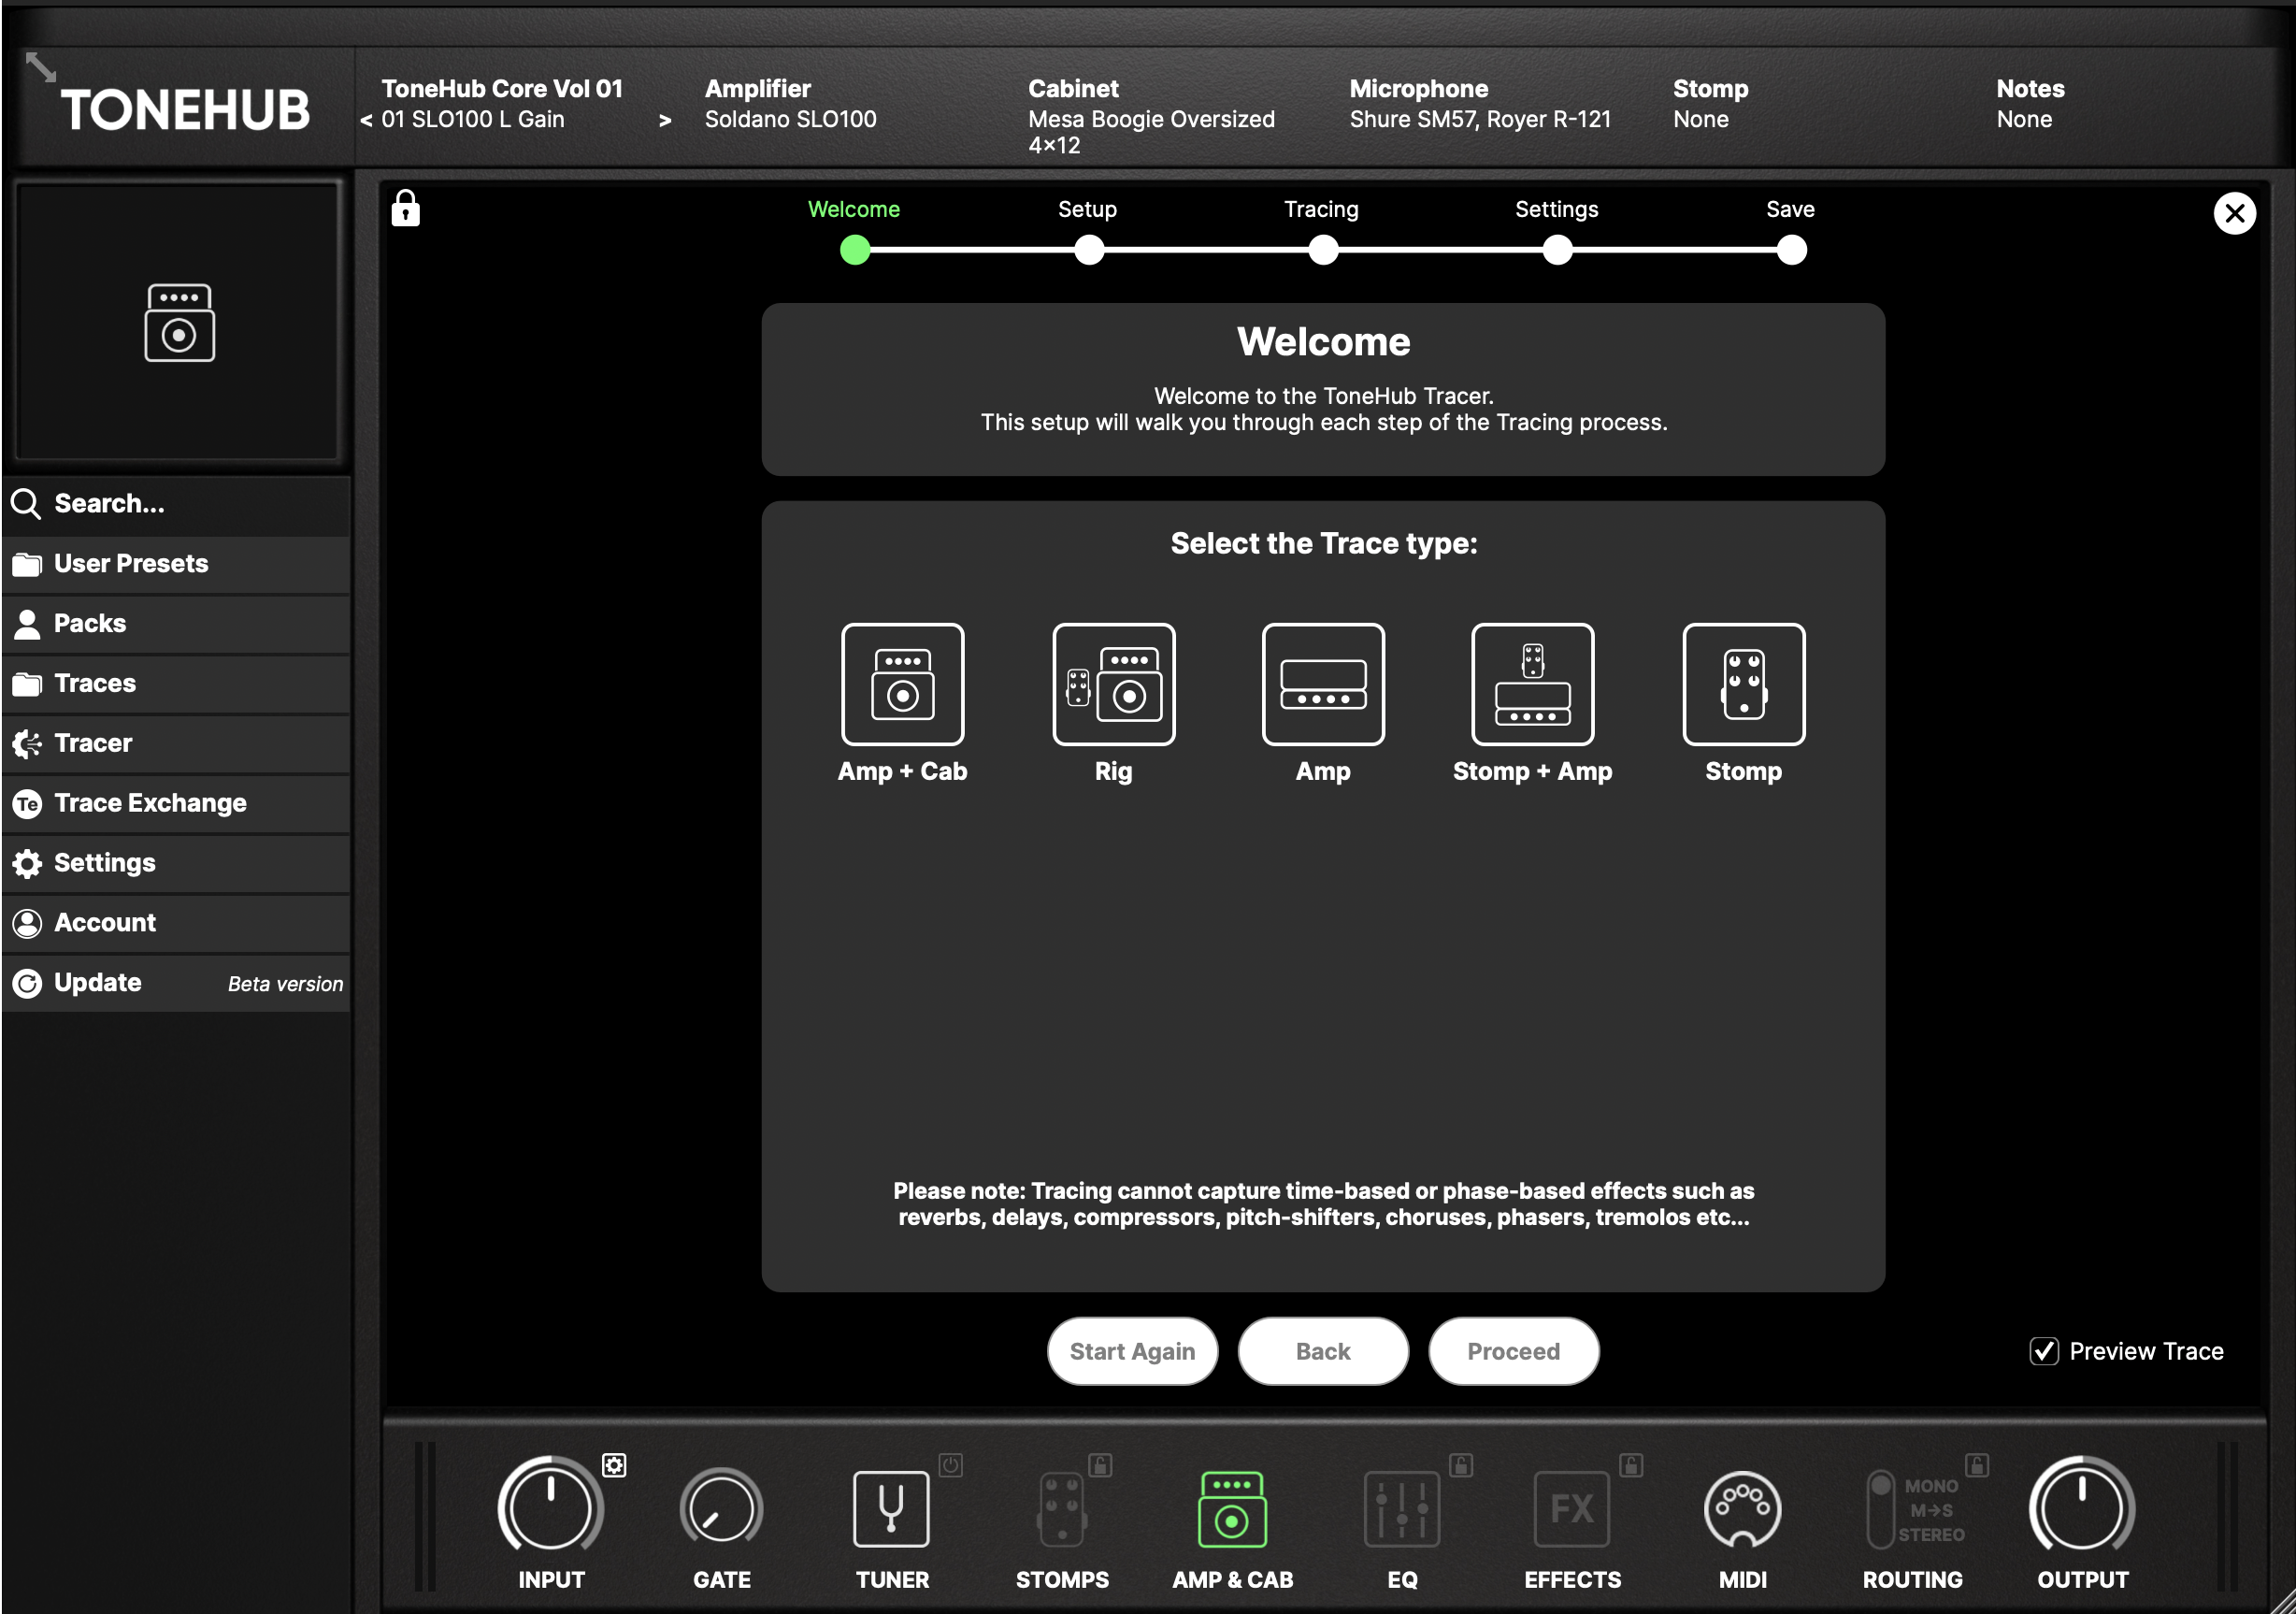
Upon opening the Tracer menu, you will be greeted with the Tracer Welcome Screen.
You can close out of this screen with the "X" button. Please note that this does not cancel the current Tracing session -- simply reopen the Tracer to continue the Tracer session if the menu is closed at any point.
The Proceed button will take you through the Tracing process. If the button is disabled, make sure you have followed the instructions of your current Tracer step.
The Start Again button will reset the current Tracing session.
The Back button will send you back a step in the process.
The Preview Trace button will allow the Tracer to temporarily load a preview of the Trace (or a DI signal before the Trace has been generated), bypassing the existing signal chain in order for you to preview the Trace results and any settings changes. You can disable by unticking.
The Trace Type selection allows you to choose the type of Trace you will be creating.
Amp + Cab: model an amp head and cabinet setup, or combo amp
Rig: model one or more stomp boxes connected to an amp head and cabinet set or combo amp.
Amp: model an amp head, or the amp section of a combo, only.
Stomp + Amp: model one or more stomp boxes connected to an amp head or the amp section of a combo amp.
Stomp: model one or more stomp boxes.
Note: for routing diagrams on how to set up your hardware, click the "Hardware Setup Example" button in the plugin or check out the diagrams in our help center.
SETUP
Create the processed audio file:
1. Locate the Tracer audio file by clicking the Locate button, then importing the Tracer audio file into your DAW.
Please refer to your DAW's instructional manual for the best way to import audio. Most DAW's allow for Drag & Dropping.
2. Run the Tracer audio file from your DAW through the desired signal chain you want to trace, recording the result to a mono, 48kHz (or above) WAV audio file.
The processed audio file should exactly match the Tracer Audio file (i.e. be sample accurate), only having been processed by your signal chain.
WARNING: if tracing hardware, exercise caution when operating analog amplifiers. Failure to connect a speaker cabinet, load box, or reamp box before powering the amplifier can result in significant damage to your equipment. Please consult your hardware's documentation for best practices.
Import the processed Audio File:
1. Import the processed Tracer audio file by clicking on the Import button.
For best results:
-Avoid digital clipping. Do not exceed 0 dBFS. Aim for a target level of around -5 dBFS at the loudest peaks of the audio file.
-Extreme deliberate digital clipping may produce unwanted results.
-No wet/dry parallel blends.
The Tracer will analyze your imported audio file and prepare it for Tracing. If any issues are detected, the plugin will warn you and you will not be able to proceed.
2. Click Proceed to begin the Tracing Process.
TRACING
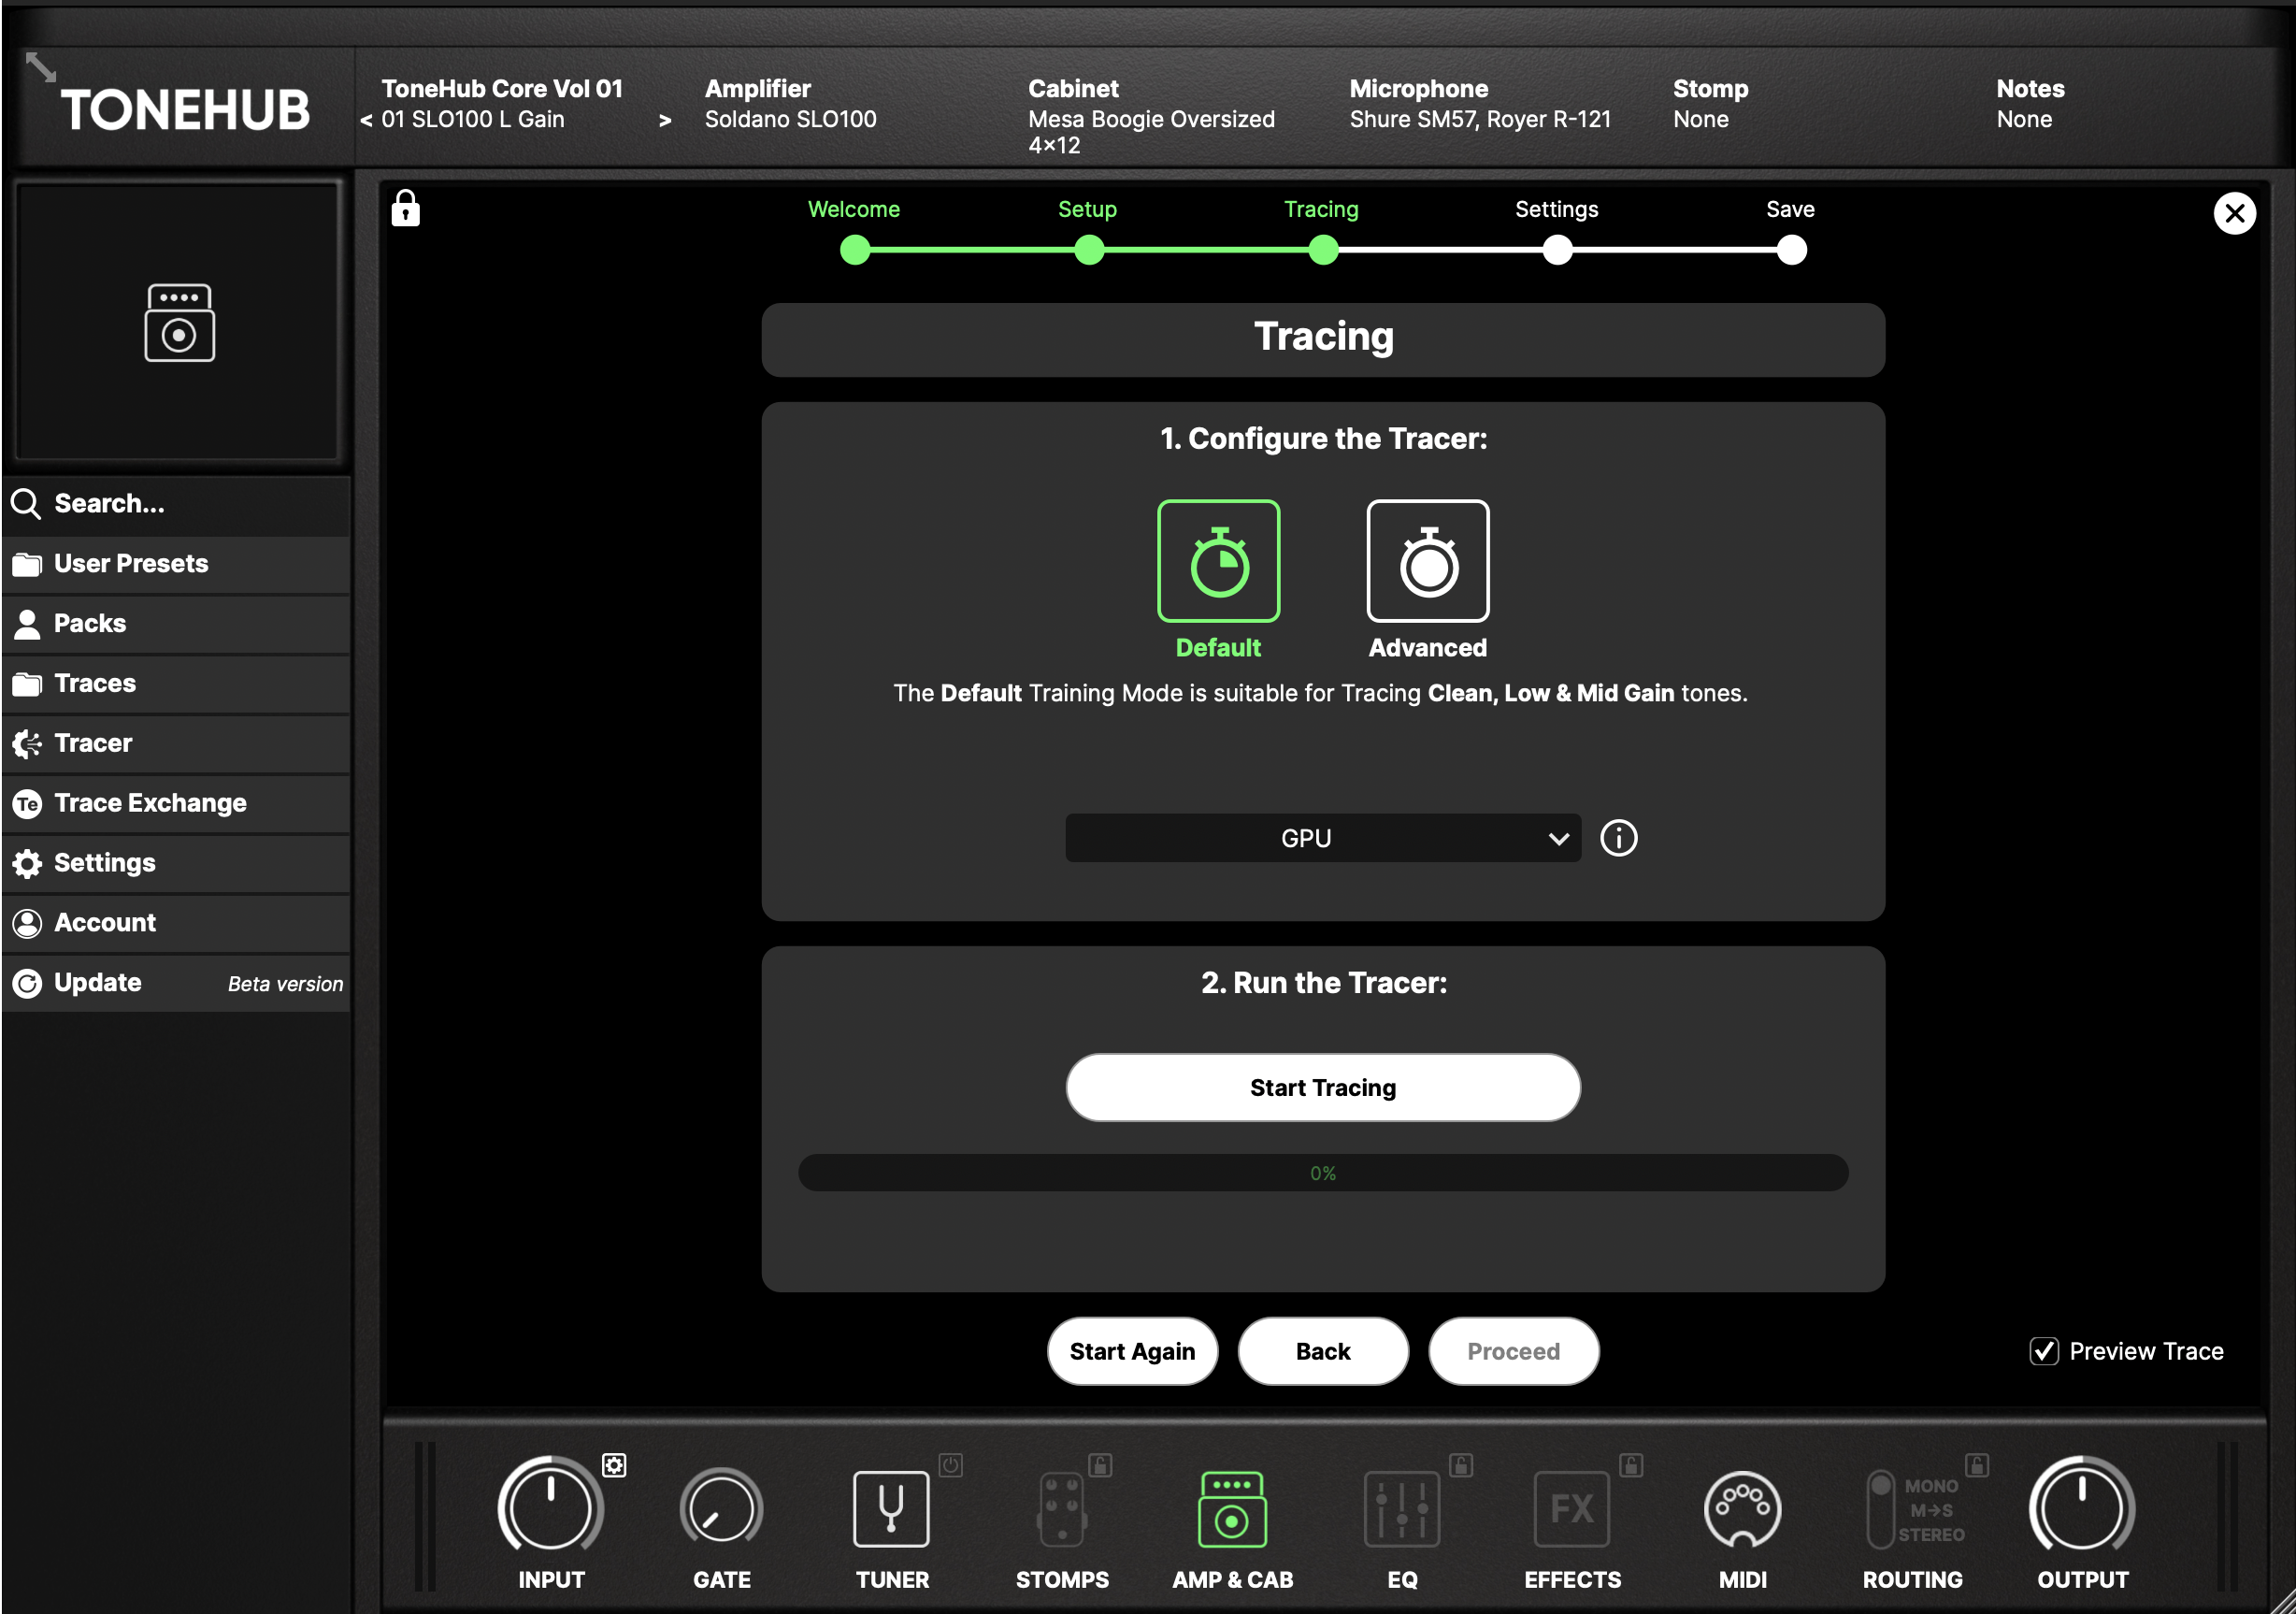
Configure the Tracer:
You will have a choice between Default and Advanced Tracing modes.
Default is suitable for tracing clean, low, and mid gain tones.
Advanced is suitable for tracing high gain and fuzz tones. It will take longer to complete.
Additionally, you will be able to choose between using your GPU or CPU for the trace. Training times will vary depending on the complexity of the distortion and your computer specifications, therefore we suggest using the GPU option if available.
However, if your computer has a low-spec GPU, then using the CPU may be faster.
IMPORTANT! The quality of your Trace will not change by selecting one option or the other. Only the training time.
Run the Tracer:
Click Start Tracing to start the Tracing process.
After the Trace completes, click Proceed to adjust the settings of your Trace.
SETTINGS
The optional settings section allows you to set the default control and cabinet mic positions for Amp Traces, including the use of our Adaptive Tracing Technology for selecting a matching Tone Stack for the amp.
Tone Stacks allows for the saved Trace to respond to parametric changes like the original gear.
The provided settings differ based on the Trace type.
Amp + Cab / Rig: provides settings for all amp and cab controls, as well as the option to select a Tone Stack that sets the behavior of parametric controls.
Amp / Stomp + Amp: provides settings for all amp controls, as well as the option to select a Tone Stack.
Stomp: provides settings for the Tracer Stomp, including a 3-band EQ.
The final Match Settings to Trace option allows you to set the control positions to match that of the original signal chain, allowing the Trace to respond to control changes like the original gear.
NOTE: certain changes to settings may result in a volume drop or increase after being "matched". Please adjust accordingly. Also note that Amp Gain control cannot be "matched".
After changing your settings, click Proceed.
SAVE
On the final page of the Tracer, you can set the Metadata for your preset and save the Trace. Saving the Trace will result in the Trace being automatically loaded into the plugin.
For optimal integration into the ToneHub Trace Browser, please ensure:
-To include the brand name followed by the product name, correctly capitalized and formatted per the product's website.
-If entering multiple products, please separate each product with a comma.
You will also enter the Trace folder to save to (or create a new folder).
Click Save to finish saving your Trace.
Where are my presets saved?
The Tracer Amplifier contains all the Tracer presets you have created, as well as Traces downloaded from the Trace Exchange.
Additionally, the Traces folder in the ToneHub menu will house your various Trace folders.
Using Traces
TRACER AMPLIFIER
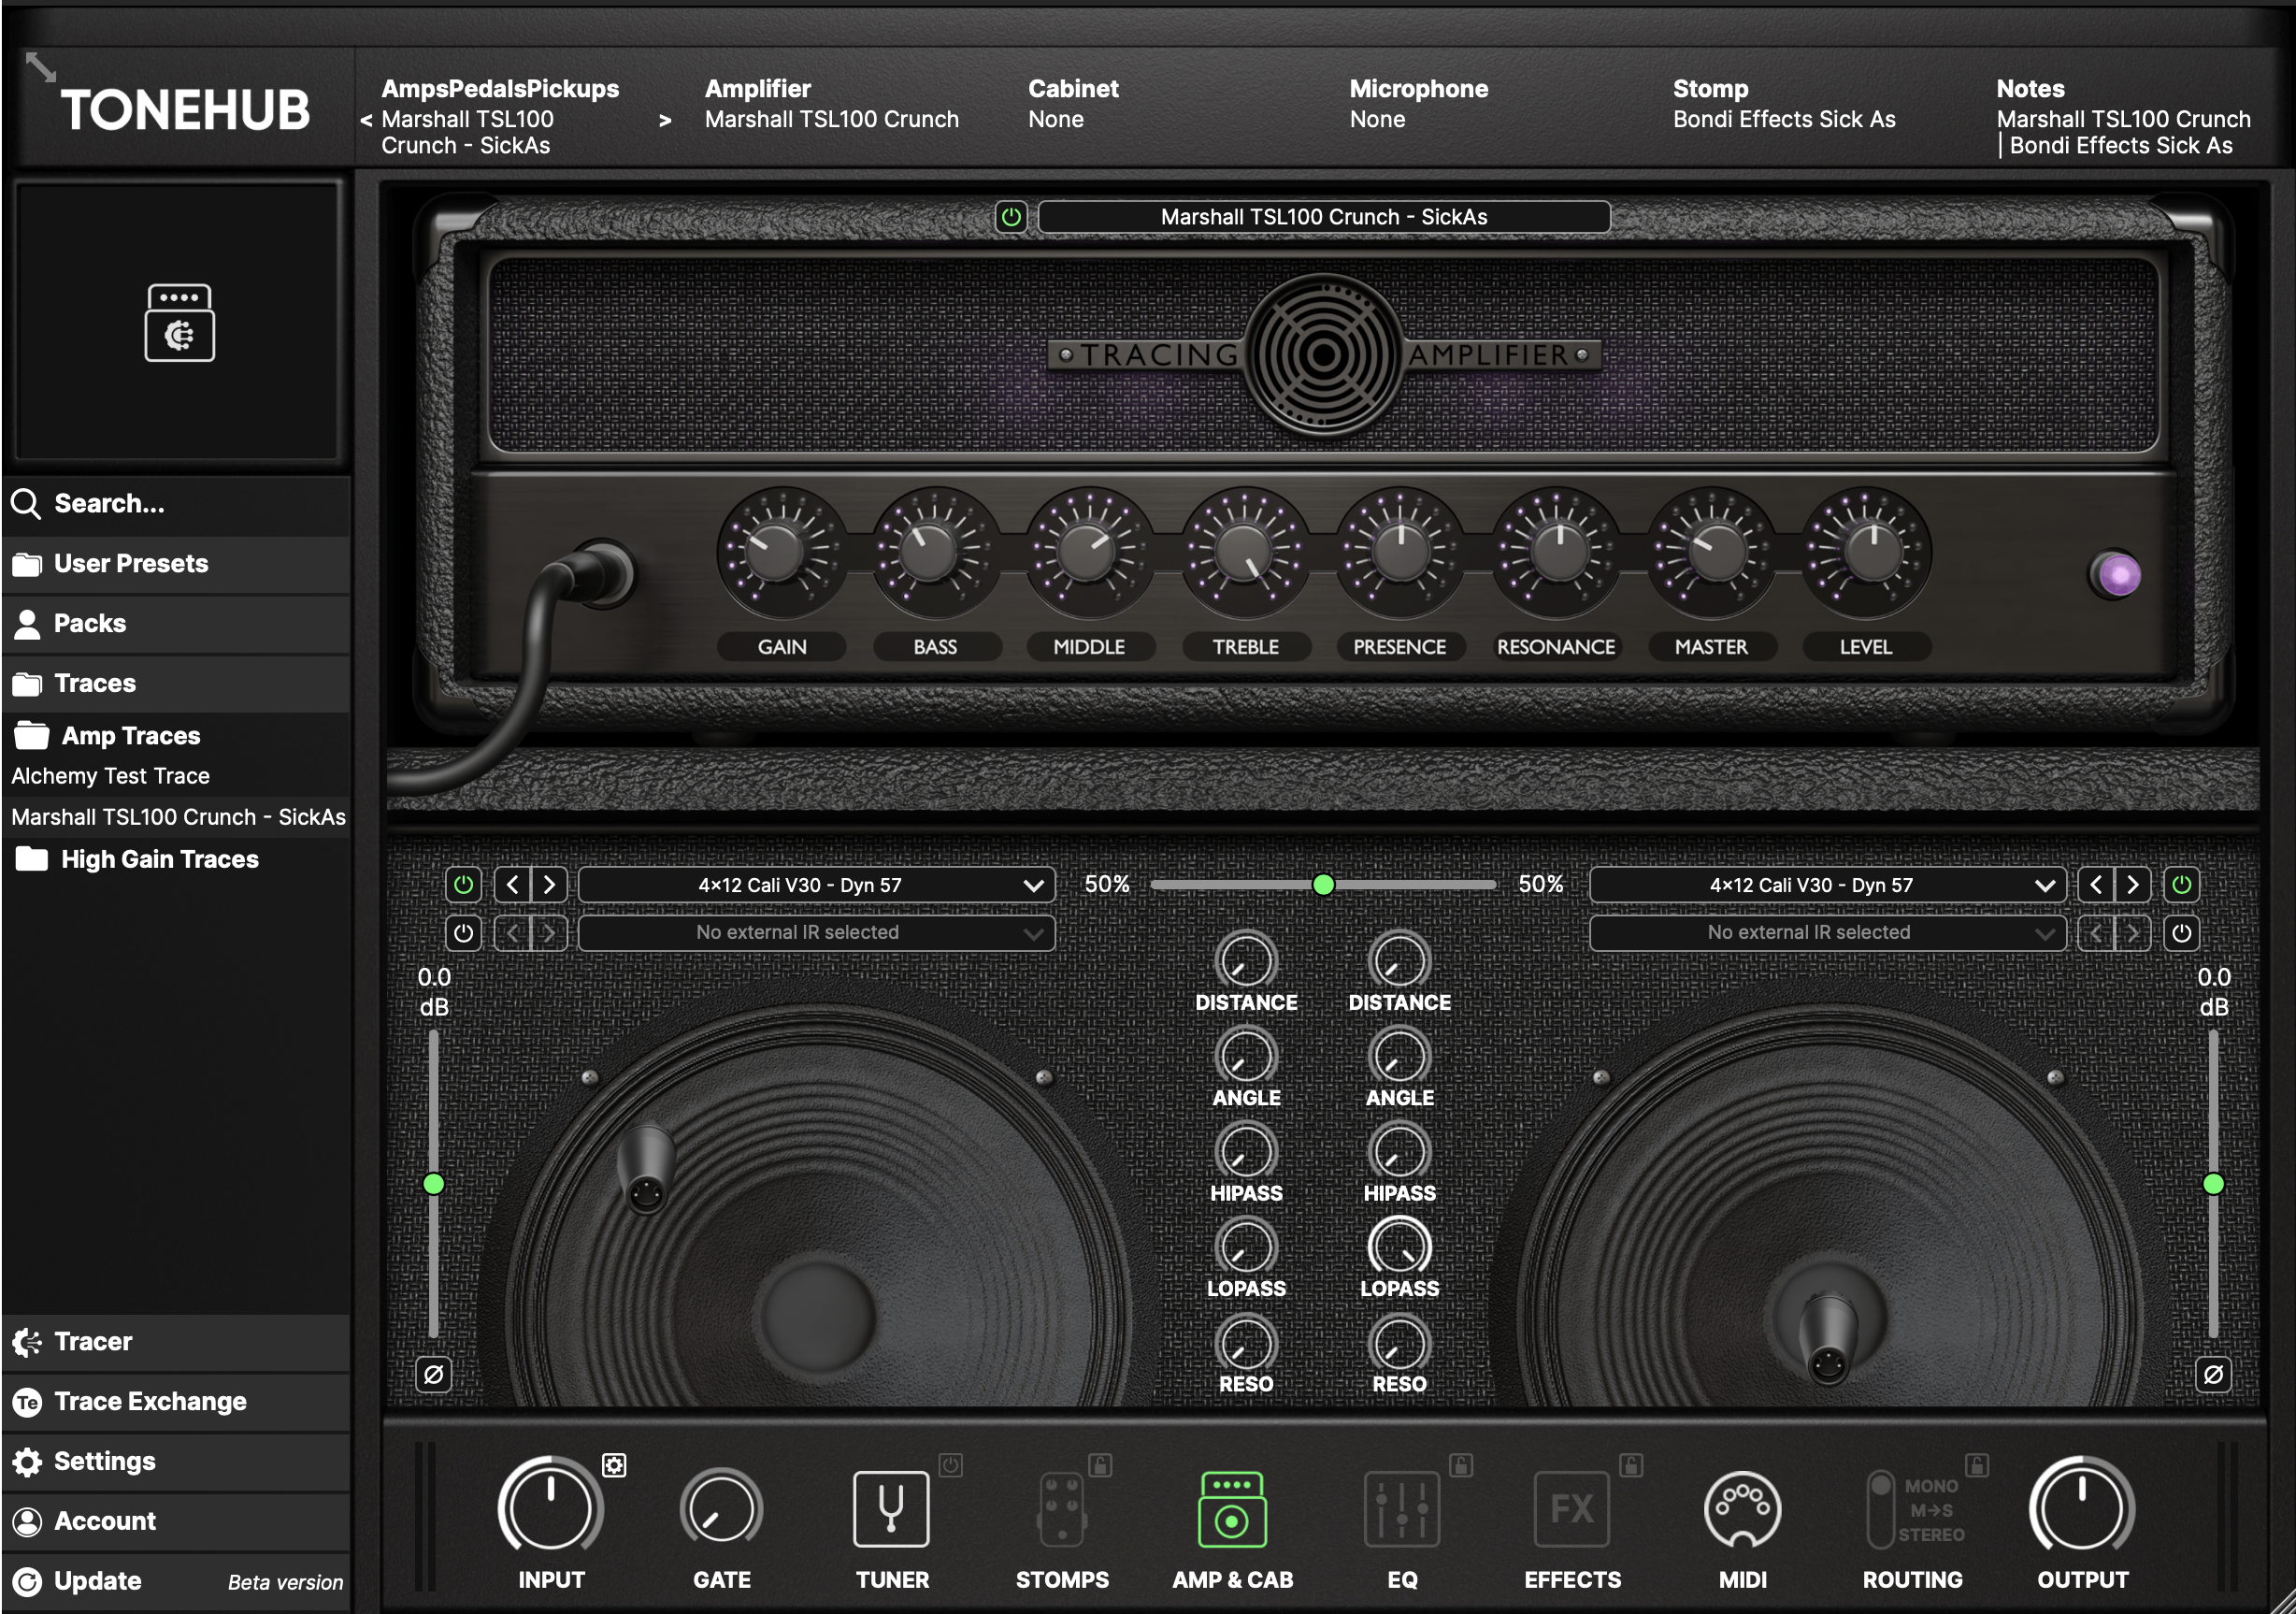
You can access your collection of Traces by selecting the menu at the top of the Tracer Amplifier. This will open the Trace Browser. From the browser you can load up your amp / rig Traces.
Depending on the type of Trace created, the cabinet section will load to reflect what you are using:
-The ToneHub cabinet simulator will appear for complete rigs that captured the cabinet as part of the Trace.
-An impulse response loader will appear for Amp & Stomp + Amp traces only.
TRACER STOMPS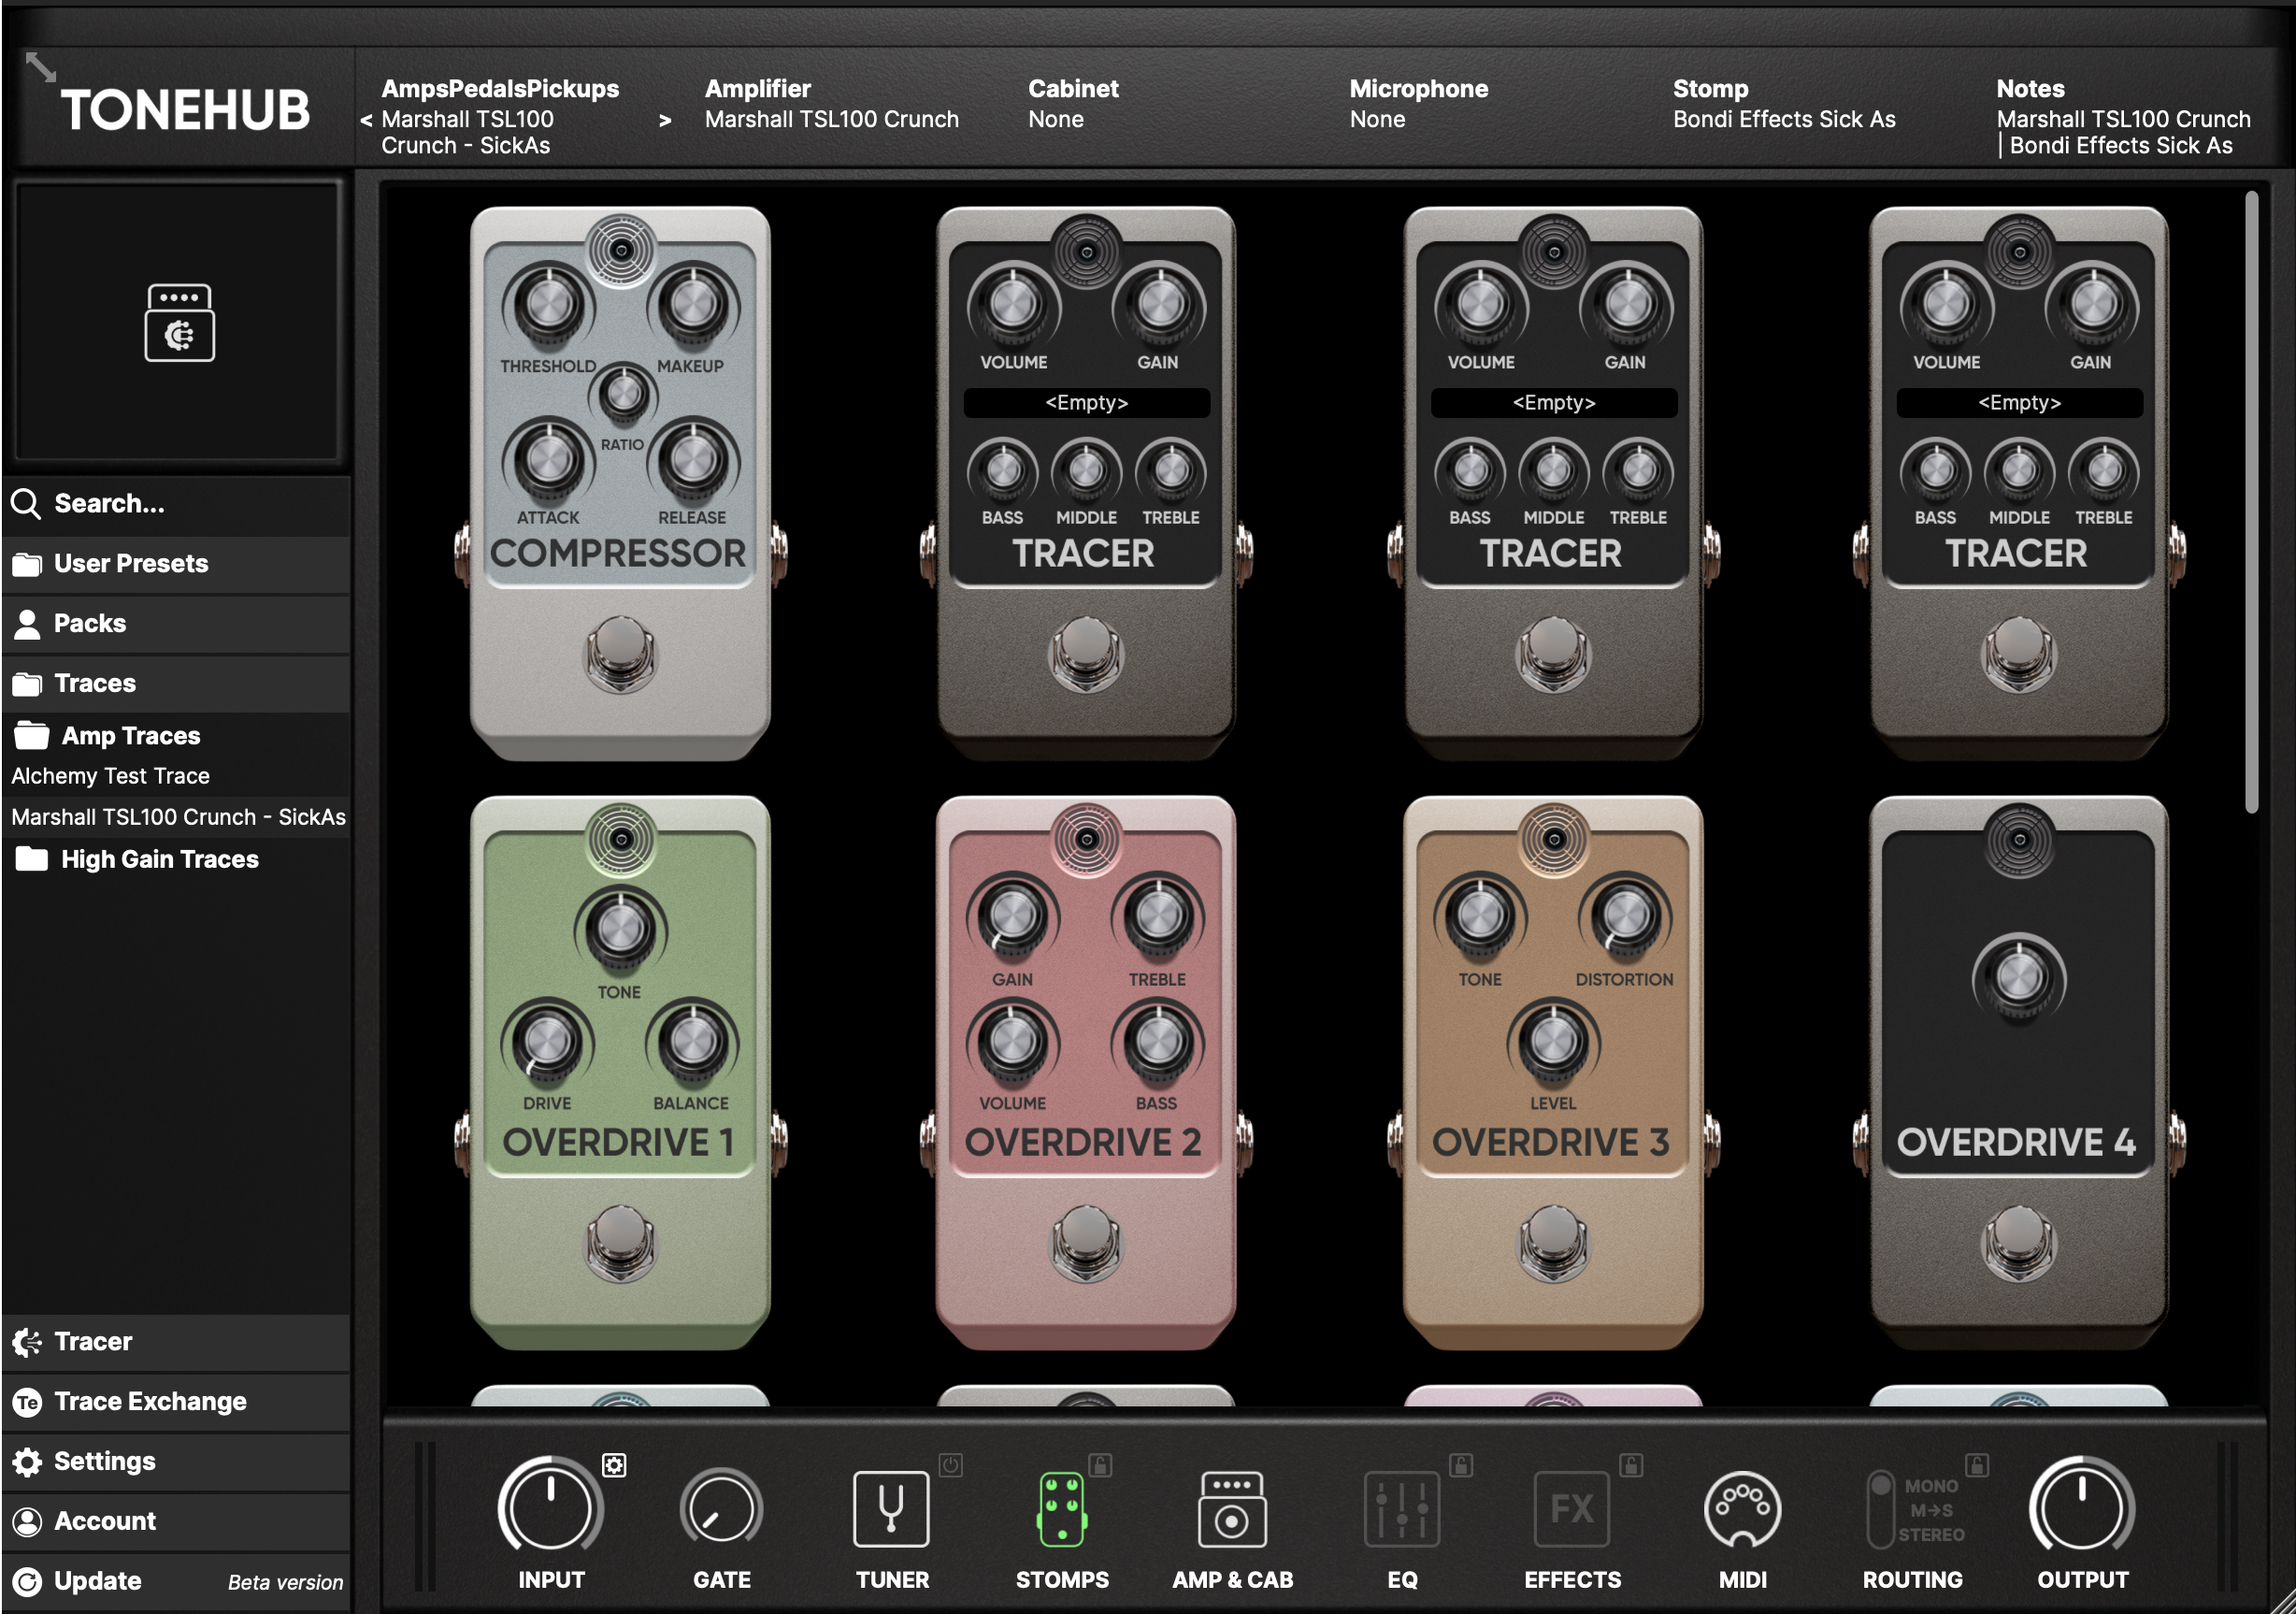
You can find the Tracer Stomp section located in ToneHub's main Stomps section. The Tracer Stomp section contains all of your stomp presets.
You can access this collection of stomp-only Traces by selecting the menu in the middle of the Tracer pedal to open the browser.
Recommended best practices
Here are some recommendations for getting the best out of your ToneHub Tracer:
- ToneHub Tracer is not able to Trace time-based effects such as delays, reverbs, compressors, tremolo/phase effects, doubler, and stereo-width enhancing tools.
- ToneHub Tracer cannot Trace expanders / gates. We recommend bypassing these processors when Tracing.
- If the volume of your Trace doesn't match the original chain, please ensure that there are no volume automation or volume changes enabled on the track or bus/aux tracks that could affect the final output level of the Trace.
- Always use a reamp box for best tracing results.